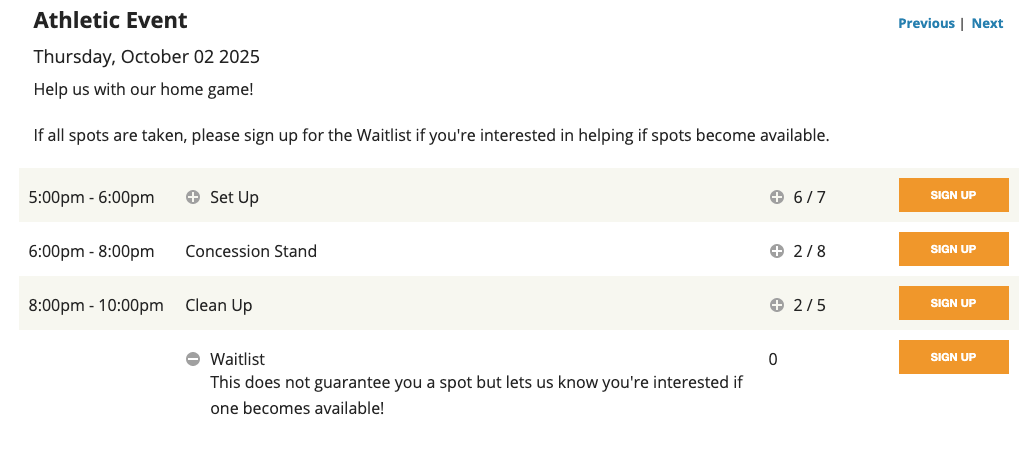
You can manage a waitlist for your event by creating a separate shift labeled "Waitlist." This allows you to keep track of volunteers who are interested in participating if a spot opens up.
How to Set Up a Waitlist Shift
Create a new shift within your event.
Title the shift “Waitlist.”
You can add a description to the Waitlist shift so volunteers know it doesn’t guarantee a spot.
Let volunteers know they can sign up here if the main shifts are full.
To effectively manage your waitlist, make sure event organizer notifications for cancelations are turned on. This ensures you’ll be notified when someone cancels their signup, freeing up a spot.
You can manage the event notifications by editing your event and expanding the Notification section. Click Save at the bottom if you make any changes.
Managing the Waitlist Shift
When a volunteer canceled their sign up and a spot opens up, you will be able to review your Waitlist shift and move a volunteer into the new open spot.
Go to your event page and click on your event.
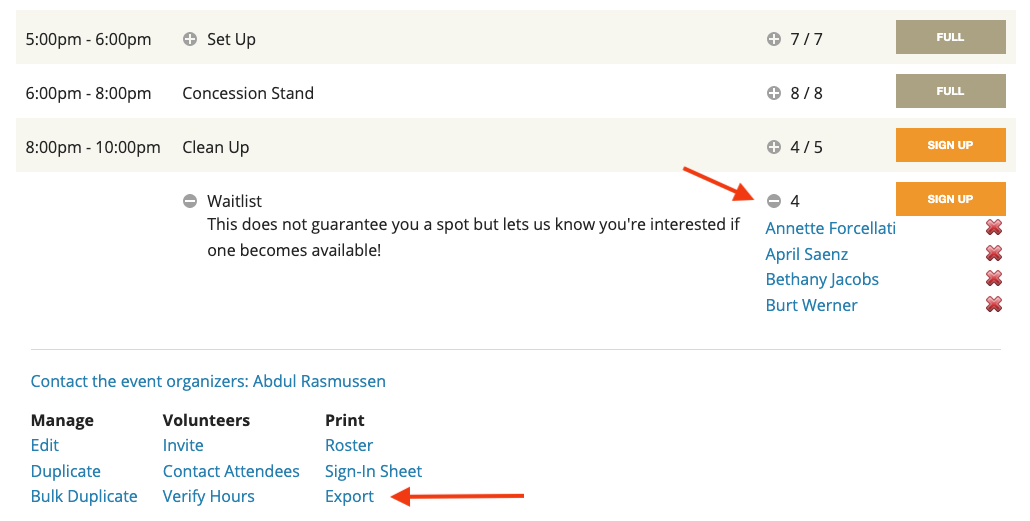
Locate the “Waitlist” shift and view who has signed up by clicking the plus sign next to the number of sign ups.
To prioritize fairly, you can click Export (under the Print option) to download the list RSVPs. There will be an RSVP Date column you can reference to find date and time stamps of RSVPs.
When you have identified who you would like to sign up in the newly opened spot, click Sign up on the relevant shift. Select Choose an existing volunteer, locate your volunteer, and sign up.
Next, remove their sign up from the “Waitlist” shift by clicking the X next to their name for that shift.
The volunteer will be notified automatically of the change in their sign up if Notify volunteer upon sign up is enabled on the event’s notification settings.
If you'd like to leave comments for a Waitlist feature, you can view this on our suggestion board here!